FridaHag · Gratis kreativ leksjon
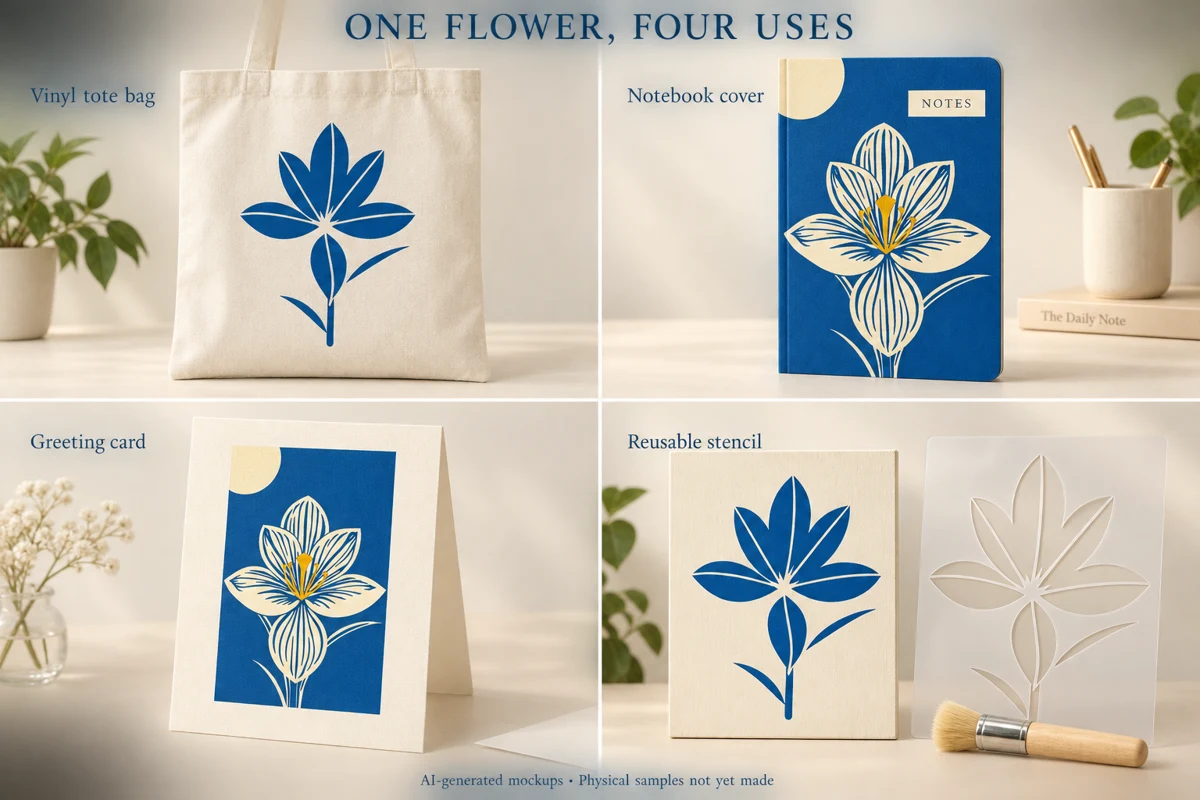
Én blomst, fire hobbyprosjekter
Bruk én blomsterillustrasjon til et motiv for handlenett, en A5-forside til notatbok, et brettet kort og en sjablong med ChatGPT og gratisprogrammet Inkscape.
En ni minutters leksjon med engelsk tale og teksting. Du velger og vurderer; assistenten hjelper med å klargjøre filene. Veiledningen begynner med en praktisk tilgangstest. Veiledning, prosjektmerknader og instruksjoner er på engelsk.
Se på YouTube fra publiseringsdatoen
Last ned prosjektfilene
Fargevektoren beholder flere detaljer. Vinylmotivet og sjablongen er forenklede tilpasninger. Notatbokfilen er bare forsiden, ikke et helt omslag. Kortet har en flat utside og blank innside. Blomstermotivet er 170 mm bredt; kontroller størrelsen og målestrekene før du lager noe.
Instruksjoner du kan kopiere (engelsk)
1. Check the setup
No artwork needed yet.
Locate a working Inkscape installation and report the version. Check your actual file, command-line and Computer Use access. Create a separate 50 mm square SVG and render a preview with Inkscape. Verify its dimensions. Do not overwrite existing work. If application-window access is unavailable, explain that specifically; do not claim to have operated the GUI.
A separate test SVG and a rendered preview; verified 50 mm square.
2. Assess the source
Attach your original flower image.
Keep my original unchanged. Assess it for four products: a coloured notebook front, a folded card, a one-colour vinyl transfer and a reusable stencil. Identify fine lines, small gaps and disconnected shapes. Suggest what can remain in print and what needs a separate cutting adaptation. Show a comparison before committing to major simplification.
A clear distinction between the detailed print design and the simpler cutting design.
3. Prepare the coloured master
Attach the original and the accepted coloured reference.
Prepare a true editable SVG with vector paths for the blue, cream and yellow areas. Preserve the composition and petal character. Do not just embed the JPEG in an SVG. Keep the original, save a new master, render it with Inkscape, and compare the whole image and enlarged edges. Report the actual method used.
An SVG with paths, a preview and an honest explanation of contour extraction versus redraw.
4. Make the notebook front
Attach Flower-Coloured-Vector.svg.
Prepare an A5 front-cover layout, exactly 148 by 210 mm. Fit the flower without stretching. Add a small NOTES label in a clear margin. This is only the front, not a wraparound cover. Export an editable SVG and A4 and US Letter actual-size PDFs with trim marks and a 50 mm calibration bar. Keep all important artwork inside the trim edge.
148 x 210 mm trimmed front; print and fit check still required.
5. Make the folded card
Attach Flower-Coloured-Vector.svg.
Prepare the outside of a card as a 210 by 148 mm flat layout. Fold at x=105 mm. Put the illustration on the right half, leave the left half plain, and preserve the image proportions. Leave the inside blank. Supply the SVG plus A4 and US Letter print sheets at actual size. Put trim marks and fold guides outside the finished artwork, and include a scale bar.
A 105 x 148 mm folded card; check a paper fold before production.
6. Prepare the vinyl version
Attach the accepted simplified motif and original for context.
Use the accepted simplified design for a single-colour vinyl SVG. Keep closed paths and remove stray specks. Set the flower motif itself to 170 mm wide; separately report the document dimensions. Verify the width after export. Preserve the accepted appearance. Explain that cutting, mirroring and pressing settings depend on the chosen material and machine.
One-colour paths with the motif width confirmed. Physical cutting, weeding and pressing remain untested.
7. Prepare and inspect the stencil
Attach Flower-Stencil-Cut.svg, or your accepted simplified design.
Prepare a reusable stencil adaptation. In the preview, black means remove and white means keep. Identify any enclosed kept islands and connect them to the outer sheet with deliberate bridges. Check that the kept material forms one connected component. Show enlarged narrow areas. Export the cut SVG and A4 and US Letter test PDFs with the same 170 mm motif width and 50 mm and 2 inch calibration bars. Do not claim that connectivity proves strength or that a physical cut has been tested.
Connected remaining sheet, useful enlarged proof, actual-size print templates, and a physical test checklist.
8. Review and package
Attach the accepted masters and print sheets.
Reopen the exported files, check SVG dimensions and path content, render every PDF, and inspect captions, trim marks and scale bars. Keep the coloured master, vinyl file, stencil and print layouts separately named. Make product mockups from these actual designs and label them as mockups. Keep mockups separate from cutting geometry. Provide a file list and state which physical tests remain. Do not publish anything.
Clearly named project files, accurate previews and a record of completed versus pending checks.
Om eksemplene
Produktbildene er KI-genererte illustrasjoner. Leksjonen bruker klargjorte undervisningsbilder og Frida Hags godkjente KI-stemmeklone. Utskrift, bretting, kutting, maling, varmepressing og vask er ennå ikke testet fysisk. Følg instruksjonene for maskinen og materialene dine.
Filene er laget for å følge leksjonen og øve på egne prosjekter. Kontakt FridaHag ved spørsmål om kommersiell lisensiering eller videredistribusjon.