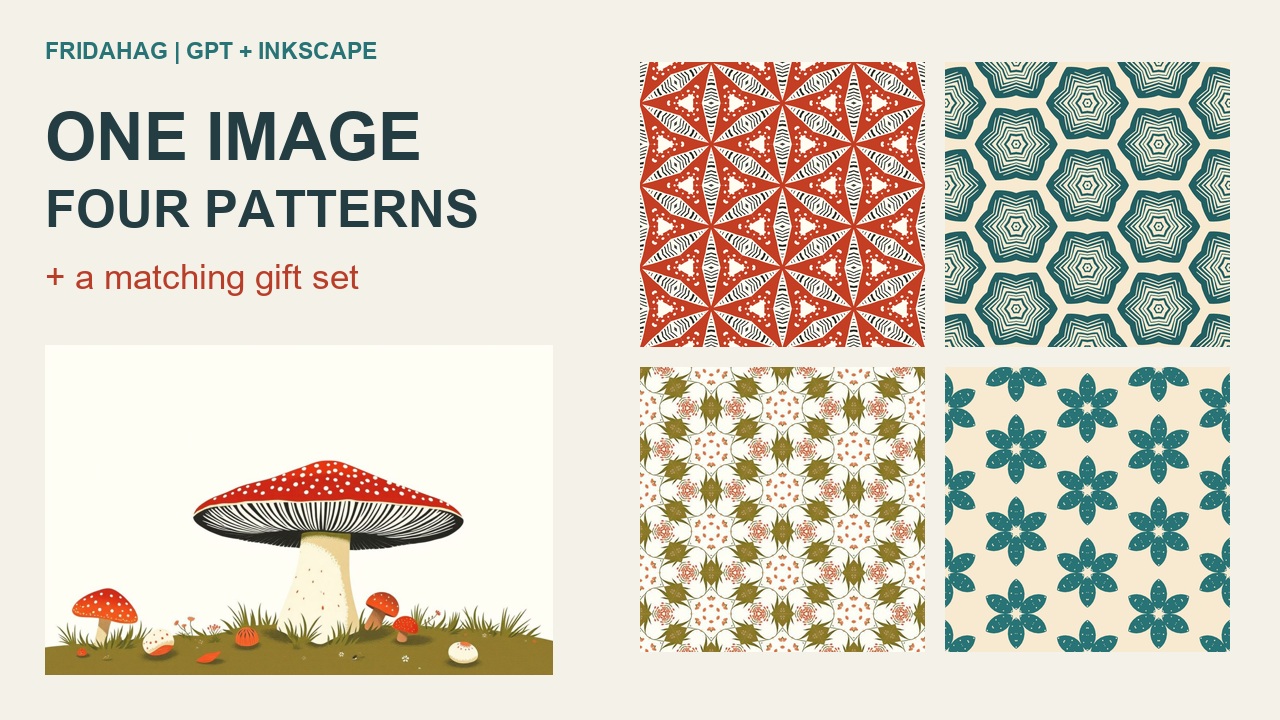
Ett bilde, fire mønstre og et gavesett
Utforsk seksfoldig symmetri, redigerbare vektormønstre og samordnet gaveinnpakning med GPT og gratisprogrammet Inkscape.
En leksjon på 20 minutter og 36 sekunder med engelsk tale og teksting. Veiledningen og prosjektfilene er på engelsk. Du styrer de kreative valgene; GPT hjelper med filarbeidet. Begynn med tilgangstesten i veiledningen.
Se på YouTube fra publiseringsdatoen
Prosjektfiler
Fire mønstre og gavepapir, tre vektorversjoner med fargevarianter, merkelapper, brettet kort og en liten gavepose. Mønster 03 beholdes som raster. PDF-ene har A4 på side 1 og US Letter på side 2; skriv ut riktig side i faktisk størrelse.
Det røde gavesettet har utskriftsfiler. Det turkise settet er en digital modell. Skogsmønsteret er en komposisjonsstudie, ikke en kontrollert sømløs original. Lag en prøveutskrift og test posen i vanlig papir.
Instruksjoner du kan kopiere (engelsk)
1. Check access
Locate Inkscape and verify what access you actually have. Create a separate 50 mm square, export it, and verify its dimensions. State whether you used application-window control or command-line rendering. Do not assume opening an app gives you control of it.
2. Discuss the brief
Inspect my attached original artwork at full size. Preserve it unchanged. Discuss suitable elements, the intended look, and two or three useful products with me before production. Distinguish the source I approve from the composition we still need to design.
3. Explore a woodland layout
Use the different mushroom shapes and selected grass, flowers and leaves. Keep each mushroom anatomically clear. Arrange whole clusters with varied sizes, spacing and angles. Show one large composition proof. Check visual rhythm and direction; do not claim seamless edges without verification.
4. Explore symmetry
Using my approved original, choose a small selection near the curved gills and cap edge. Build a 30-degree wedge with reflections, then six 60-degree sections around one centre. Repeat the resulting hexagonal construction on a hexagonal lattice. Explore crop position, size and angle. Show the strongest proof and state the tools actually used. Do not subscribe to a service.
5. Explore other source selections
Preserve the accepted construction. Make a few alternatives from different areas of my original, such as the smaller cap and grass-and-flower details. Compare large repeated surfaces, not just isolated tiles. Avoid obvious blank boxes, heavy ground bands and arbitrary extra decoration.
6. Adjust motif spacing
Keep the approved star shape and repeat centres. Increase the star size by 30 percent within the same space. Do not enlarge motif and spacing together. Check for collisions and show the old and new arrangements at equal scale.
7. Trace selected patterns
Vectorize only patterns 01, 02 and 04. Keep 03 raster. Preserve the approved compositions, narrow lines and holes. Separate foreground colours from the background. Use true paths, not a bitmap embedded in SVG. Show close comparisons and report any texture or shading lost. Name the actual tracing method.
8. Make a colour variation
Use the accepted vector geometry unchanged. Set the accent to #287375 and the background to #f7ead1. Where there is a separate dark linework layer, use #233d42. Save a new SVG and preview; keep the original colours. Ensure shapes, spacing and dimensions are identical.
9. Compose the companion set
Use our agreed gift tags, folded card and mini bag. Compose each for its purpose: writing space on the tag, a clear front on the card, and a quiet label area on the bag. Show one coordinated set using the actual layouts before making more variations.
10. Prepare tags and card
Create six 55 by 85 mm tags with cut outlines, punch guides and clear To and From lines. Create a 180 by 130 mm card exterior, with the front on the right and back on the left, folding at 90 mm. Keep the inside blank and put fold marks outside the trimmed card. Export A4 and US Letter pages at the same product dimensions.
11. Prepare the bag
Create a mini bag net for a 60 by 30 by 110 mm body: panels 60, 30, 60 and 30 mm wide, then a 12 mm side glue tab. Include 10 mm top hems, two 22 mm broad base flaps and two 18 mm short flaps. Distinguish cut, fold and glue areas. Add a 50 mm check line and assembly instructions. State that physical assembly requires a plain-paper test.
12. Show a second appearance
Make one alternate mockup of the same products. Use the teal petal repeat with star accents. Label it as a digital mockup. Do not imply that alternate print sheets or physical samples exist unless they have actually been made.
13. Check and package
Render every PDF page, check artwork and text, and confirm the actual dimensions. Verify that the repeat tile joins in both directions. Keep source, raster pattern, vector patterns, colour variants, print sheets and mockups clearly identified. Mark studies and physical tests honestly. Prepare a review, but do not publish without permission.
Om leksjonen
Laget med Frida Hags kunstneriske ledelse og godkjente KI-stemmeklone. GPT brukte lokale skript og Inkscape til filbehandling. Videoen viser faktiske prosjektfiler og klargjorte diagrammer.
Filene er til bruk med leksjonen og egne øvingsprosjekter. Kontakt FridaHag ved spørsmål om kommersiell lisensiering eller videredistribusjon.
Ferdig prosjektpakke
40 filer fra den ferdige leksjonen: illustrasjoner, redigerbare filer, utskrifts-PDF-er og veiledning. Gratis (€0+); frivillige bidrag er velkomne. Filene er på engelsk og følger de samme vilkårene for egne øvingsprosjekter.